Intro
If you work with storage applications or storage hardware there’s a good chance you’ve heard of ZFS. ZFS is essentially a software implementation of RAID but in my experience the most reliable it’s software RAID I’ve worked with.
Comparison to standard RAID
Over the years I’ve worked with several implementations of hardware RAID and for the most part they are pretty equal. However, most hardware RAID implementations I’ve seen — mine included — aren’t really done well. Before I move on to ZFS RAID I’m going to cover the basic problems I’ve come across with Hardware RAID setups which contributed to my switch to ZFS. In this list below RAID = “Hardware RAID”
- RAID controllers are typically more expensive than HBAs
- Many RAID users do not properly set their cache settings on top of the fact that most cards do not come with a BBU. Lots of admins get frustrated with throughput and force write-back without a BBU
- RAID controllers rarely keep up with drive capacity
- Sometimes the implementation is proprietary which can make your setup less scalable (limited RAID sets, inability to mix/max nested raid or difficult to expand existing sets)
- Most user interfaces I have worked with for hardware RAID were poor; i.e. option ROMs on the card that can’t see full disk names or OS specific utilities that are buggy or available to select OS installs only
- I’ve yet to see a RAID card that allows you to perform a scan for errors like the ZFS scrub. I’m not saying they don’t exist, just haven’t see them
My personal history with ZFS
I first discovered ZFS or “RaidZ” in 2011 when I was deciding on a storage setup for our virtual disk images (then in VMWare). We were always running out of space because the hardware RAID controllers we had at the time only supported small disks so I decided to do some digging. My first attempt at ZFS was using Openindiana which now depreciated so if you want to go the Solaris route I recommend using Omni. I was familiar with Linux at the time but ZFS was designed for Solaris which felt close to Linux but different enough that there was a learning curve.
I used Openindiana until it wasn’t updated and then switched to OmniOS but Solaris for one reason or another — partially due to a different CLI — kept pissing me off. However, the main catalyst for looking into ZoL (ZFS on Linux) was my dream of a unified computer and storage node. To wrap it all up I’ve run ZoL on CentOS, Ubuntu & Debian for about 2 years without any serious or “mystery” incidents both at work and at home. The purpose of this history was to cover the questions you might be having in your head:
- Why I don’t use hardware RAID? (6 reasons above)
- Why I don’t use Solaris for ZFS? Basically, I like Linux better so it’s personal choice with the added benefit of native Linux packages sooner/without the need to port.
Setting up ZFS
During this section I’m going to assume you know nothing about ZFS so that everyone can follow along. However I will break into parts so you can skip around if you already know.While most of the stuff I cover will work in Solaris keep in mind these steps were performed on Linux so it’s possible some techniques may not transfer to Solaris.
My demo setup
To make sure I don’t miss anything I’m going to do a live setup in a VM so that if you following along to what I’m doing exactly I _shouldn’t_ miss anything.
| Variable | Details |
| OS | Ubuntu 14.04 LTS |
| ZFS | ZoL (http://zfsonlinux.org/) version 0.6.3 for Ubuntu |
| CPU | 4 VM cores from an i7-2600 3.4Ghz |
| MEM | 4 GB of VM ram from DDR3 host memory |
| NIC | 1x1Gbe |
| Disks | 1 30Gb OS disk and 8 1Gb disks for ZFS examples |
Step 1: Install Ubuntu — the same way you normally would —
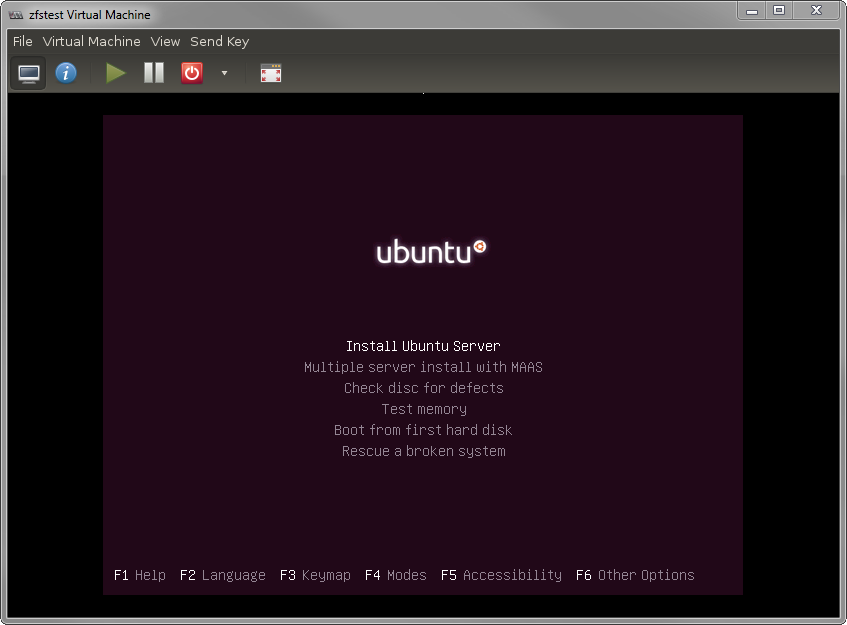 Ubuntu install screen |
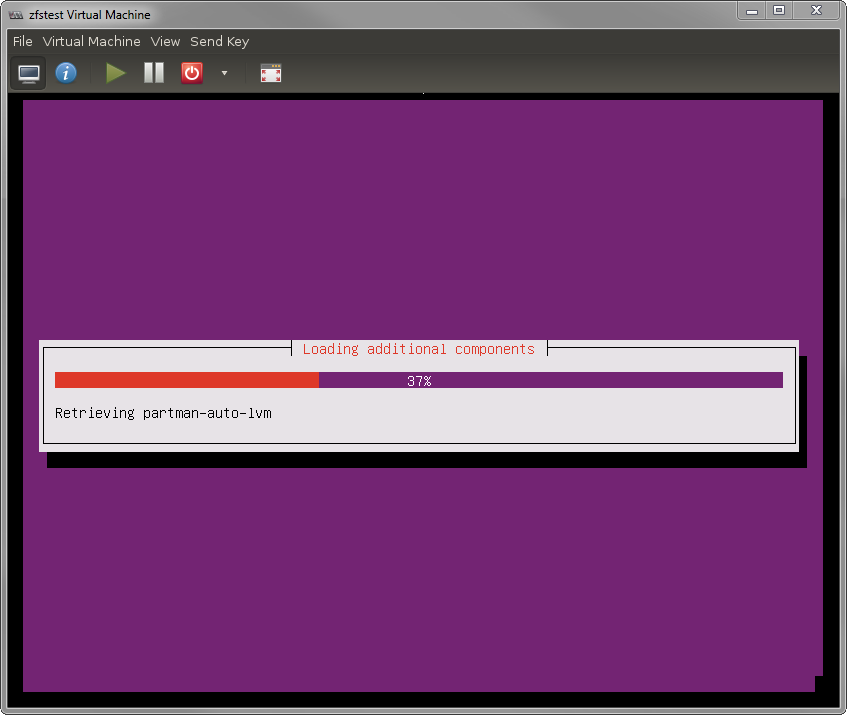 Getting started |
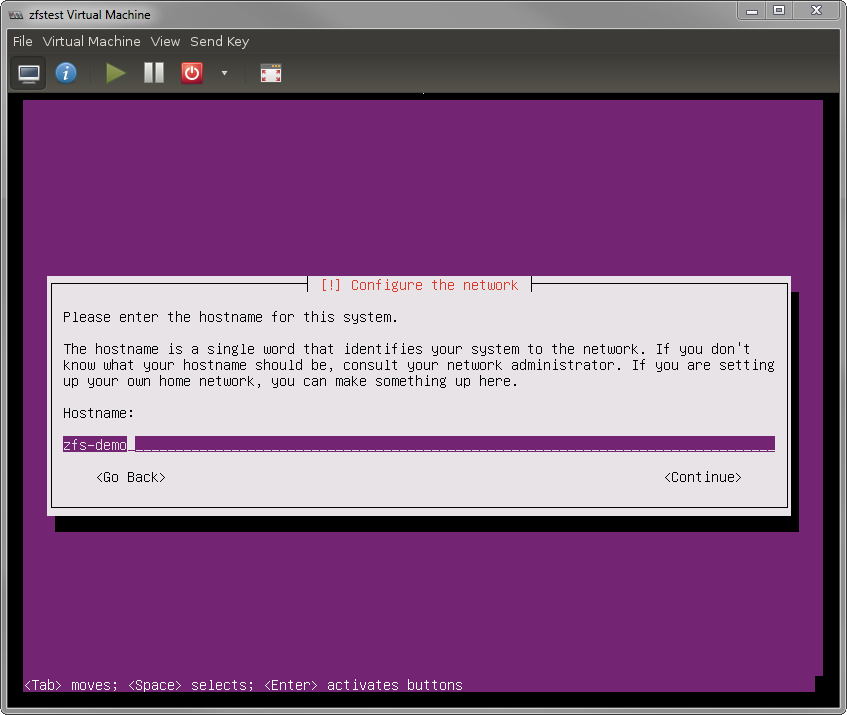 My demo hostname |
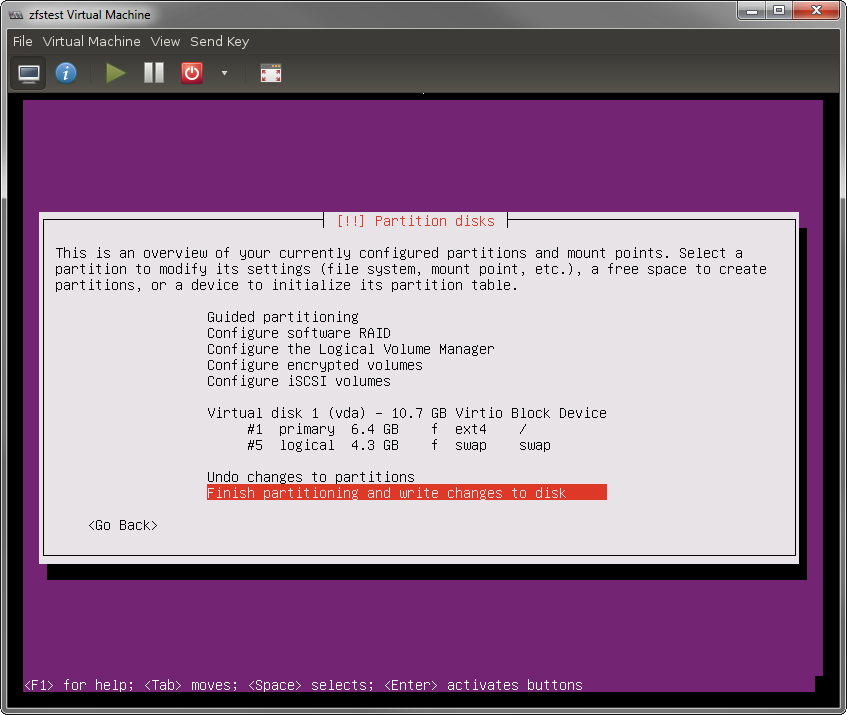 Not a big fan of LVM myself |
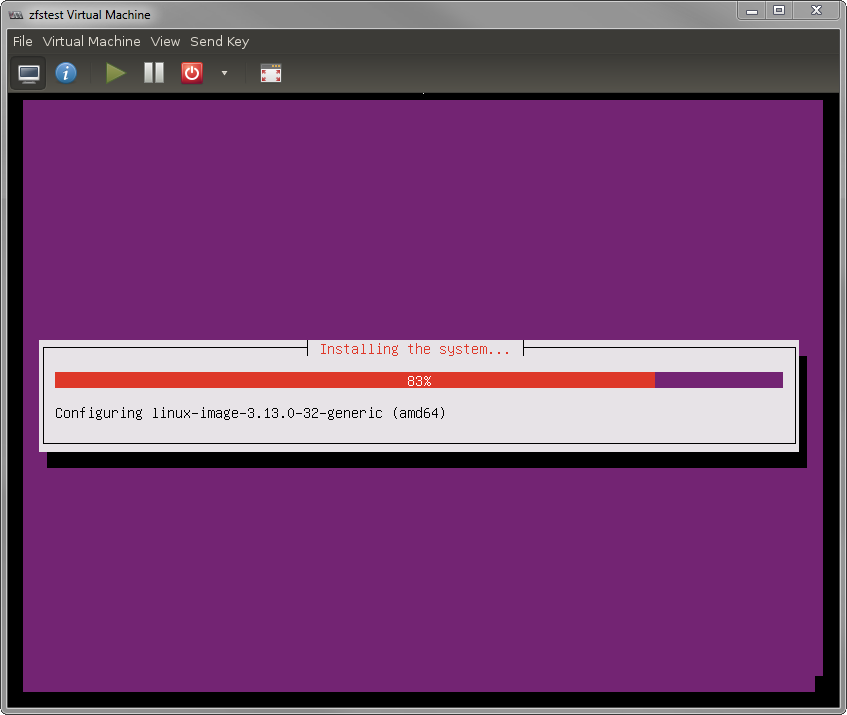 Installing |
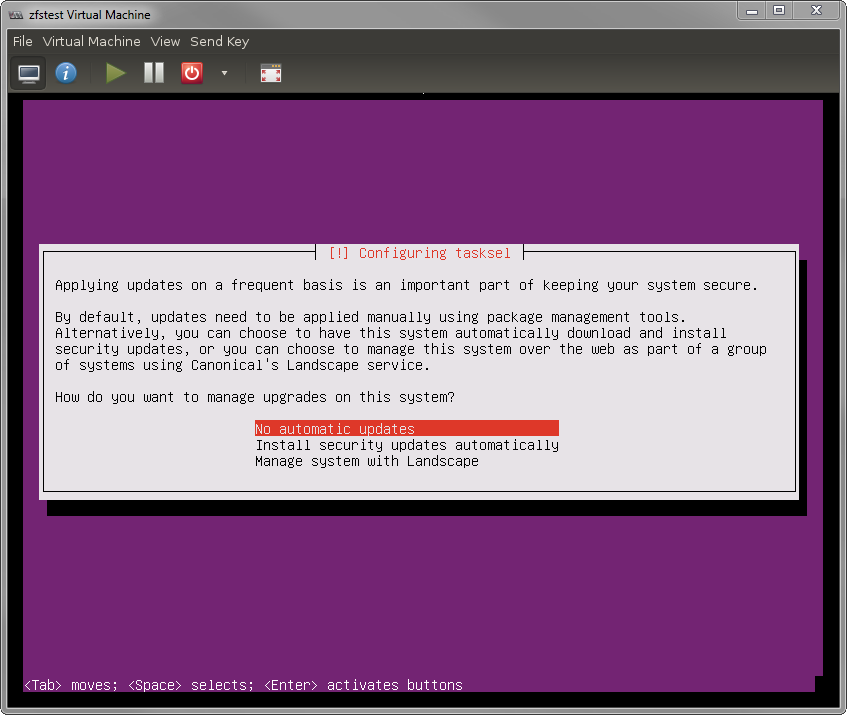 Auto updates are a bad idea for a server |
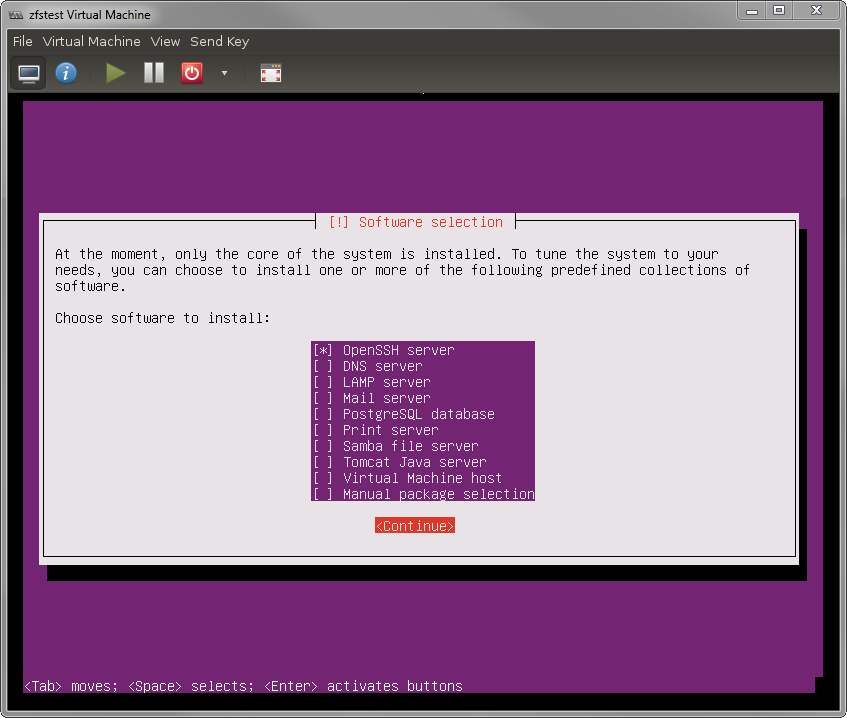 Really only need SSH |
 And we’re ready! |
Now that the install is done I’m switching to SSH, for a variety of reasons I still use windows for my main work machine and I highly recommend Cygwin over the traditional putty.
Step 2: Get updated
Login via ssh — or local if you prefer — via the username you created. To get started you’ll want to up by typing
sudo -s
apt-get update
apt-get upgrade
shutdown -r -time 0
Because Ubuntu doesn’t actually set a password for the “root” user. You want to reboot because there is a chance a new kernel was installed during the upgrade command and ZFS needs to be reinstalled at each kernel update — we’ll cover more on that later –. Once you’ve rebooted, log back in and sudo -s.
Step 3: Install ZFS
Next you’ll want to download and install ZFS. Instructions for ZoL install may change over time — it’s presently August 2014) — so you might want to visit this link to see if the Ubuntu package PPA has changed from the ZoL page
http://zfsonlinux.org/
Otherwise continue with the following
apt-add-repository ppa:zfs-native/stable
apt-get update
apt-get install ubuntu-zfs
The last step — installing ubuntu-zfs — might take up to 10 minutes depending your system and internet speed.
Step 4: Basic test
Once the install finishes you’ll want to try out a few commands to make sure things “work”. If you’ve followed along with me this far you should basically see this:
root@zfs-demo:~# zfs list
no datasets available

root@zfs-demo:~# zpool status
no pools available
Step 5: Basic ZFS concepts
Before we go any further with software setup it’s important to acknowledge that while I’m only working in a VM for demo purposes a real setup will be on bare metal. The setup of a ZFS system on bare metal means that every setup decision you make has physical consequences; so let’s first discuss the logical setup which will in turn drive your hardware needs. The logical parts of ZFS are fairly simple to understand:
- Pools
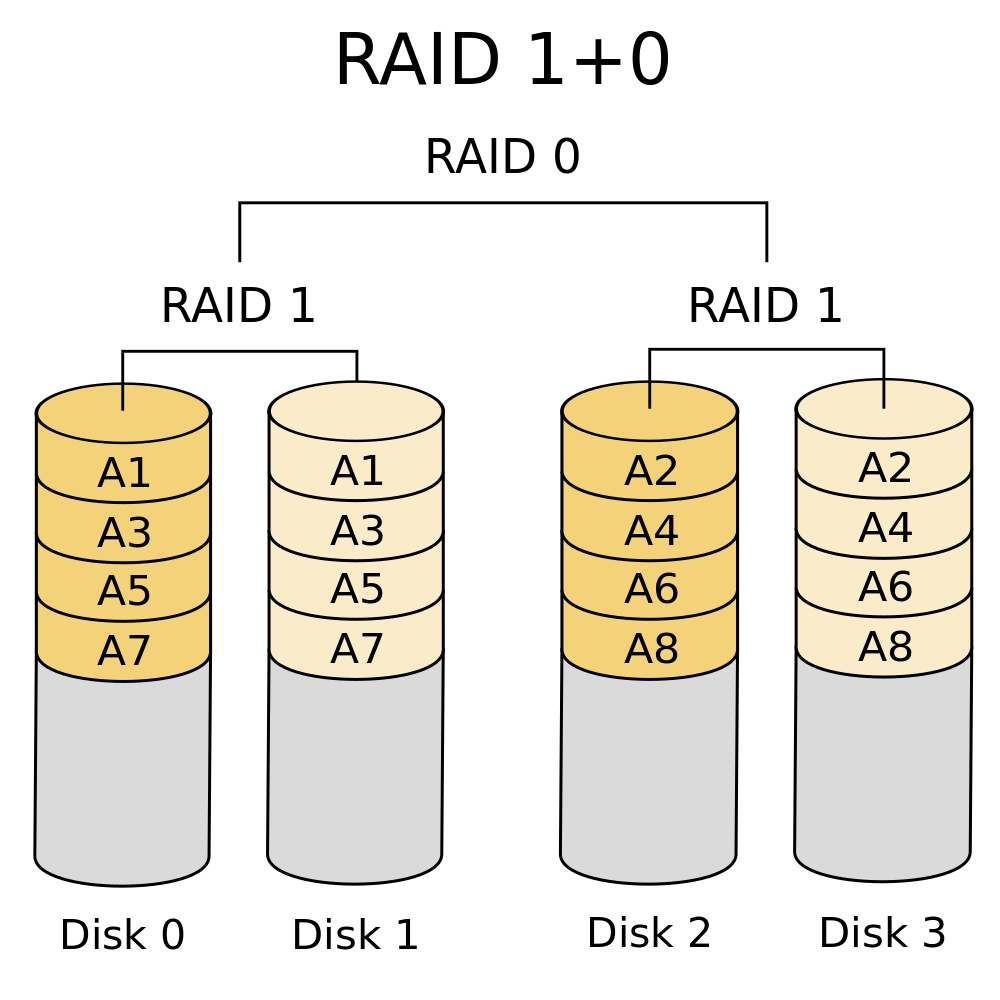
In ZFS pools are essentially a collection of physical disks. However, an important concept to understand is that they are not simply pools of “single” disks — but they can be — but rather they are pools of virtual devices hereafter known as “vdevs”. A vdev will be very familiar to anyone who has worked with RAID. Any RAID # configuration you can think of can be represented in ZFS by a vdev. Types of vdevs correlate to RAID you would be familiar with and they are:vdev Desription Pros Cons Min # Disks* CLI create Single Just a single disk, it fails you lose everything Cheap
Full use of disk spaceOnly one Disk speed
It dies, you lose1 zpool create pool disk1 Mirror This is RAID-1 and can be as many disks as want 2/3/4/5 way mirros Great data redundancy
Fast read speedPoor space efficiency
Write speed of 1 disk2
zpool create pool mirror disk1 disk2 RaidZ1 Just like RAID 5, you’re allowed to lose one disk without penalty Great use of space
Great read performanceWrite penalty x4
Expensive Parity checks2 zpool create pool raidz1 disk1 disk2 RaidZ2 Just like RAID 6, you’re allowed to lose two disks Good use of space
Great read performanceWrite penalty x6
Slower than Raidz13 zpool create pool raidz2 disk1 disk2 disk3 RaidZ3 Comparable to fictional RAID 7, you can lose three disks Superior data protection
Great read performanceWrite penalty x8
Most expensive RAIDZ4 zpool create pool raidz3 disk1 disk2 disk3 disk4 * This is not my recommended # of disks but the absolute minimum, for further on why see this article http://blog.delphix.com/matt/2014/06/06/zfs-stripe-width/
However, pools can be multiple vdevs which means you can stripe RaidZ2 vdevs to construct something similar to hardware RAID 60. There isn’t really a limit to how you can combine them and creating a pool is as simple as:zfs create poolname disk0 disk1 disk2 disk3
The above would create a pool of 4 disks JBOD (stripe). If you’re using disks for the first time that have no partitions, or have an old setup you want to clear, you need to use “-f”.
- Datasets
Datasets are essentially groups of data or ZFS file systems that are stored on the raw data area that is a pool. Datasets are mounted just like any other FS (you can put them in your fstab) but by default they’ll be mounted at pool/dataset off your root. - ZVOLs
ZVOLs are raw block devices crated over your pool. Essentially this is a new /dev/sdX that you can format however you like (ext4, xfs, even ZFS!) and it is backed by the integrity of the pool. A ZVOL is the most like hardware RAID you’ll get out of ZFS. - L2ARC and SLOG
Something that is very powerful about ZFS is the ability to add fast drives (like SSDs or RAM drives) to pools of otherwise slow mechanic HDDs. These fast drives supplement your pool in hard times of read or synchronous write stress. The L2ARC is a read cache which is dynamically populated with your most likely to be needed read data (based on history) and the SLOG is a safe place that writes can go so an fsync can be returned before the data is dumped from RAM to HDD. I will likely have separate articles about these at a later date.
Some very useful ZFS concepts to understand
- ZFS is a copy on write filesystem with snapshot capability. The reason this is important is because it gives you the ability to perform fully writable dataset/zvol clones in real-time with no performance hit and no space taken up (except what has actually changed). In my work this means if I need a clone of 20 virtual machines it takes less than 1 second, and it also means I can perform and keep 15 minute backups for 2 years with only 20% more space used.
- ZFS supports real-time the compression modes of lzjb, gzip, zle & lz4. The ZFS manual currently recommends the use of lz4 for a balance between performance and compression.
- ZFS supports de-duplication which means that if someone has 100 copies of the same movie we will only store that data once.
- ZFS supports sending of entire datasets/zvols even pools to other ZFS system while online (even if the receiving pool is a different config)
- All of these settings a hierarchical and tunable down to each dataset/zvol. You can have compression on one and not the other
- ZFS can perform real-time scrubs
- All changes can be made while the pool is online
Step 6: Choosing your hardware
When building a storage system it’s important to choose the right hardware. There are only really a few basic requirements to run a decent ZFS system
- Make sure the software can see you drives natively (you don’t want HW RAID in the way). JBOD mode, IT Firmware, or just an HBA
- Do not use drive bay expanders (while it’s suppose to be “ok”) with SAS drives it definitely isn’t with SATA. Each SFF 8087 gets max 4 disks. Or if you’re just using SATA channels it’s 1×1 not multipliers
- If you’re using cheaper disks plan your pool to accommodate: meaning plan for a drive failure during a rebuild of another
- Lots of RAM (you want MIN 16GB)
- Plan to use SSDs, you might not right away depending on how picky you are about your data (or how much you trust your UPS) but once you start tweaking you’ll want them so leave some channels/bays open for that. Personally I recommend something like this for your SSDs
- If you’re using compression (get some CPU) or deduplication (also add more RAM) these operations can be somewhat expensive
Step 7: Let’s build
So let’s assume you’ve got your hardware together, you’ve installed Ubuntu 14.04 (or any other ZoL compatible OS) and ZFS is up and running. So as I explained at the beginning I’ve got 8 1GB disks to play with for demo purposes. So let’s have some fun!
Disk Setup
First off, let’s take a look at my disks
root@zfs-demo:/# zpool status
no pools available
root@zfs-demo:/# parted
GNU Parted 2.3
Using /dev/sda
Welcome to GNU Parted! Type 'help' to view a list of commands.
(parted) print devices
/dev/sda (1074MB)
/dev/sdb (1074MB)
/dev/sdc (1074MB)
/dev/sdd (1074MB)
/dev/sde (1074MB)
/dev/sdf (1074MB)
/dev/sdg (1074MB)
/dev/sdh (1074MB)
/dev/vda (10.7GB)
(parted)
You can see above that I have 8 1024MB disks. However they are dangerously only represented by their /dev/sdX (which can change and corrupt your pool if someone starts hot-adding disks, or even between power cycles). There are two solutions to this.
Consistent device IDs via export/import
First solution (import export trick)
root@zfs-demo:/# zpool status
no pools available

root@zfs-demo:/# zpool create -f neo raidz3 /dev/sda /dev/sdb /dev/sdc /dev/sdd /dev/sde /dev/sdf /dev/sdg /dev/sdh
root@zfs-demo:/# zpool status
  pool: neo
 state: ONLINE
  scan: none requested
config:

        NAME        STATE     READ WRITE CKSUM
        neo         ONLINE       0     0     0
          raidz3-0  ONLINE       0     0     0
            sda     ONLINE       0     0     0
            sdb     ONLINE       0     0     0
            sdc     ONLINE       0     0     0
            sdd     ONLINE       0     0     0
            sde     ONLINE       0     0     0
            sdf     ONLINE       0     0     0
            sdg     ONLINE       0     0     0
            sdh     ONLINE       0     0     0

errors: No known data errors

root@zfs-demo:/# zpool export neo
root@zfs-demo:/# zpool import neo -d /dev/disk/by-id
root@zfs-demo:/# zpool status
  pool: neo
 state: ONLINE
  scan: none requested
config:

        NAME                           STATE     READ WRITE CKSUM
        neo                            ONLINE       0     0     0
          raidz3-0                     ONLINE       0     0     0
            ata-QEMU_HARDDISK_QM00004  ONLINE       0     0     0
            ata-QEMU_HARDDISK_QM00005  ONLINE       0     0     0
            ata-QEMU_HARDDISK_QM00007  ONLINE       0     0     0
            ata-QEMU_HARDDISK_QM00009  ONLINE       0     0     0
            ata-QEMU_HARDDISK_QM00011  ONLINE       0     0     0
            ata-QEMU_HARDDISK_QM00013  ONLINE       0     0     0
            ata-QEMU_HARDDISK_QM00015  ONLINE       0     0     0
            ata-QEMU_HARDDISK_QM00017  ONLINE       0     0     0

errors: No known data errors
root@zfs-demo:/#
Now we have a set of disks that the identify will never change, we also have a way we can label the tray, hmm but that’s kinda ugly and long there must be a better way. You may have noticed in the above command I used “-f” this is required when the disks have no partitions on them because ZFS is trying to protect you from including non-zfs disks so you need to use -f to confirm it.
Consistent device IDs via vdev_id.conf file
Second solution (drive aliases)
First take a look at how we imported with -d /dev/disk/by-id. This is a directory you can look at
root@zfs-demo:/# ls -al /dev/disk/by-id
total 0
drwxr-xr-x 2 root root 540 Aug 18 23:12 .
drwxr-xr-x 6 root root 120 Aug 18 23:11 ..
lrwxrwxrwx 1 root root   9 Aug 18 23:11 ata-QEMU_DVD-ROM_QM00003 -> ../../sr0
lrwxrwxrwx 1 root root   9 Aug 18 23:12 ata-QEMU_HARDDISK_QM00004 -> ../../sda
lrwxrwxrwx 1 root root  10 Aug 18 23:12 ata-QEMU_HARDDISK_QM00004-part1 -> ../../sda1
lrwxrwxrwx 1 root root  10 Aug 18 23:12 ata-QEMU_HARDDISK_QM00004-part9 -> ../../sda9
lrwxrwxrwx 1 root root   9 Aug 18 23:12 ata-QEMU_HARDDISK_QM00005 -> ../../sdb
lrwxrwxrwx 1 root root  10 Aug 18 23:12 ata-QEMU_HARDDISK_QM00005-part1 -> ../../sdb1
lrwxrwxrwx 1 root root  10 Aug 18 23:12 ata-QEMU_HARDDISK_QM00005-part9 -> ../../sdb9
lrwxrwxrwx 1 root root   9 Aug 18 23:12 ata-QEMU_HARDDISK_QM00007 -> ../../sdc
lrwxrwxrwx 1 root root  10 Aug 18 23:12 ata-QEMU_HARDDISK_QM00007-part1 -> ../../sdc1
lrwxrwxrwx 1 root root  10 Aug 18 23:12 ata-QEMU_HARDDISK_QM00007-part9 -> ../../sdc9
lrwxrwxrwx 1 root root   9 Aug 18 23:12 ata-QEMU_HARDDISK_QM00009 -> ../../sdd
lrwxrwxrwx 1 root root  10 Aug 18 23:12 ata-QEMU_HARDDISK_QM00009-part1 -> ../../sdd1
lrwxrwxrwx 1 root root  10 Aug 18 23:12 ata-QEMU_HARDDISK_QM00009-part9 -> ../../sdd9
lrwxrwxrwx 1 root root   9 Aug 18 23:12 ata-QEMU_HARDDISK_QM00011 -> ../../sde
lrwxrwxrwx 1 root root  10 Aug 18 23:12 ata-QEMU_HARDDISK_QM00011-part1 -> ../../sde1
lrwxrwxrwx 1 root root  10 Aug 18 23:12 ata-QEMU_HARDDISK_QM00011-part9 -> ../../sde9
lrwxrwxrwx 1 root root   9 Aug 18 23:12 ata-QEMU_HARDDISK_QM00013 -> ../../sdf
lrwxrwxrwx 1 root root  10 Aug 18 23:12 ata-QEMU_HARDDISK_QM00013-part1 -> ../../sdf1
lrwxrwxrwx 1 root root  10 Aug 18 23:12 ata-QEMU_HARDDISK_QM00013-part9 -> ../../sdf9
lrwxrwxrwx 1 root root   9 Aug 18 23:12 ata-QEMU_HARDDISK_QM00015 -> ../../sdg
lrwxrwxrwx 1 root root  10 Aug 18 23:12 ata-QEMU_HARDDISK_QM00015-part1 -> ../../sdg1
lrwxrwxrwx 1 root root  10 Aug 18 23:12 ata-QEMU_HARDDISK_QM00015-part9 -> ../../sdg9
lrwxrwxrwx 1 root root   9 Aug 18 23:12 ata-QEMU_HARDDISK_QM00017 -> ../../sdh
lrwxrwxrwx 1 root root  10 Aug 18 23:12 ata-QEMU_HARDDISK_QM00017-part1 -> ../../sdh1
lrwxrwxrwx 1 root root  10 Aug 18 23:12 ata-QEMU_HARDDISK_QM00017-part9 -> ../../sdh9
The above show the “by-id” tags for each /dev/sdX. We can take this and place them into /etc/zfs/vdev_id.conf
root@zfs-demo:/# cat /etc/zfs/vdev_id.conf
# make sure to run "udevadm trigger" to update the /dev/disk/by-vdev/ list once each time you change this file

alias 01        /dev/disk/by-id/ata-QEMU_HARDDISK_QM00004
alias 02        /dev/disk/by-id/ata-QEMU_HARDDISK_QM00005
alias 03        /dev/disk/by-id/ata-QEMU_HARDDISK_QM00007
alias 04        /dev/disk/by-id/ata-QEMU_HARDDISK_QM00009
alias 05        /dev/disk/by-id/ata-QEMU_HARDDISK_QM00011
alias 06        /dev/disk/by-id/ata-QEMU_HARDDISK_QM00013
alias 07        /dev/disk/by-id/ata-QEMU_HARDDISK_QM00015
alias 08        /dev/disk/by-id/ata-QEMU_HARDDISK_QM00017
Once this file exists (matching your ids) you can run “udevadm trigger”
root@zfs-demo:/dev/disk# ls -al
total 0
drwxr-xr-x  6 root root  120 Aug 18 23:11 .
drwxr-xr-x 16 root root 4740 Aug 18 23:12 ..
drwxr-xr-x  2 root root  540 Aug 18 23:12 by-id
drwxr-xr-x  2 root root   60 Aug 18 23:12 by-partlabel
drwxr-xr-x  2 root root  360 Aug 18 23:12 by-partuuid
drwxr-xr-x  2 root root   80 Aug 18 23:11 by-uuid

root@zfs-demo:/dev/disk# udevadm trigger
root@zfs-demo:/dev/disk# ls -al
total 0
drwxr-xr-x  7 root root  140 Aug 18 23:22 .
drwxr-xr-x 16 root root 4740 Aug 18 23:12 ..
drwxr-xr-x  2 root root  540 Aug 18 23:12 by-id
drwxr-xr-x  2 root root   60 Aug 18 23:22 by-partlabel
drwxr-xr-x  2 root root  360 Aug 18 23:12 by-partuuid
drwxr-xr-x  2 root root   80 Aug 18 23:11 by-uuid
drwxr-xr-x  2 root root  460 Aug 18 23:22 by-vdev

root@zfs-demo:/dev/disk# ls -al ./by-vdev
total 0
drwxr-xr-x 2 root root 460 Aug 18 23:22 .
drwxr-xr-x 7 root root 140 Aug 18 23:22 ..
lrwxrwxrwx 1 root root   9 Aug 18 23:22 01 -> ../../sda
lrwxrwxrwx 1 root root  10 Aug 18 23:22 01-part1 -> ../../sda1
lrwxrwxrwx 1 root root  10 Aug 18 23:22 01-part9 -> ../../sda9
lrwxrwxrwx 1 root root   9 Aug 18 23:22 02 -> ../../sdb
lrwxrwxrwx 1 root root  10 Aug 18 23:22 02-part1 -> ../../sdb1
lrwxrwxrwx 1 root root  10 Aug 18 23:22 02-part9 -> ../../sdb9
lrwxrwxrwx 1 root root   9 Aug 18 23:22 03 -> ../../sdc
lrwxrwxrwx 1 root root  10 Aug 18 23:22 03-part1 -> ../../sdc1
lrwxrwxrwx 1 root root  10 Aug 18 23:22 03-part9 -> ../../sdc9
lrwxrwxrwx 1 root root   9 Aug 18 23:22 04 -> ../../sdd
lrwxrwxrwx 1 root root  10 Aug 18 23:22 04-part1 -> ../../sdd1
lrwxrwxrwx 1 root root  10 Aug 18 23:22 04-part9 -> ../../sdd9
lrwxrwxrwx 1 root root   9 Aug 18 23:22 05 -> ../../sde
lrwxrwxrwx 1 root root  10 Aug 18 23:22 05-part1 -> ../../sde1
lrwxrwxrwx 1 root root  10 Aug 18 23:22 05-part9 -> ../../sde9
lrwxrwxrwx 1 root root   9 Aug 18 23:22 06 -> ../../sdf
lrwxrwxrwx 1 root root  10 Aug 18 23:22 06-part1 -> ../../sdf1
lrwxrwxrwx 1 root root  10 Aug 18 23:22 06-part9 -> ../../sdf9
lrwxrwxrwx 1 root root   9 Aug 18 23:28 07 -> ../../sdg
lrwxrwxrwx 1 root root  10 Aug 18 23:28 07-part1 -> ../../sdg1
lrwxrwxrwx 1 root root  10 Aug 18 23:28 07-part9 -> ../../sdg9
lrwxrwxrwx 1 root root   9 Aug 18 23:22 08 -> ../../sdh
lrwxrwxrwx 1 root root  10 Aug 18 23:22 08-part1 -> ../../sdh1
lrwxrwxrwx 1 root root  10 Aug 18 23:22 08-part9 -> ../../sdh9
root@zfs-demo:/dev/disk#
Now that these links exist I can always use them with zfs (or anything in linux). So now I can do cool and easy stuff like re-create my pool (let’s try a mirror setup this time) with far less hassle
root@zfs-demo:/# zpool destroy neo
root@zfs-demo:/# zpool create supershredder mirror 01 02 mirror 03 04 mirror 05 06 mirror 07 08
root@zfs-demo:/# zpool status
  pool: supershredder
 state: ONLINE
  scan: none requested
config:

        NAME        STATE     READ WRITE CKSUM
        supershredder  ONLINE       0     0     0
          mirror-0  ONLINE       0     0     0
            01      ONLINE       0     0     0
            02      ONLINE       0     0     0
          mirror-1  ONLINE       0     0     0
            03      ONLINE       0     0     0
            04      ONLINE       0     0     0
          mirror-2  ONLINE       0     0     0
            05      ONLINE       0     0     0
            06      ONLINE       0     0     0
          mirror-3  ONLINE       0     0     0
            07      ONLINE       0     0     0
            08      ONLINE       0     0     0

errors: No known data errors
root@zfs-demo:/#
And, as a bonus it’ll be super easy to put 01-08 stickers on the front of my chassis (yes I agree we should have started at 00). On a side note, this pool will perform much better over all but it’s only safe for 1 disk to fail and you get half the space.
4k “Advanced format” drives
A note about 4k drives (advanced format)
These days most 4k drives are “honest” about their sector size. However if you know you have a 4k drives you can run “zdb” to check to see if the property value for your pool “ashift=12” is there. Ashift=9 means aligned for 512b sectors instead of the 4096b sectors you’d find in most WD drives today. Additionally when creating you’re pool you can always add “-o ashift=12” to ensure that’s done properly. I have not honestly done side by side comparison tests but I’ve been told that there are significant performance losses by having a 4096b drive aligned to 512b sectors instead.
Step 8: Let’s make our datasets, finally!
So we’ve got a mirror pool setup we’re happy with and now we want a place to put the data, version the data etc. Well the good news is all the hard work is done and now ZFS will be super easy to work with. Here’s an example:
root@zfs-demo:/# zfs list
NAME            USED  AVAIL  REFER  MOUNTPOINT
supershredder   116K  3.88G    30K  /supershredder

root@zfs-demo:/# zfs create supershredder/lamedeath
root@zfs-demo:/# zfs list
NAME                      USED  AVAIL  REFER  MOUNTPOINT
supershredder             153K  3.88G    30K  /supershredder
supershredder/lamedeath    30K  3.88G    30K  /supershredder/lamedeath

root@zfs-demo:/# cd /supershredder/lamedeath
root@zfs-demo:/supershredder/lamedeath# ls -al
total 3
drwxr-xr-x 2 root root 2 Aug 18 23:42 .
drwxr-xr-x 3 root root 3 Aug 18 23:42 ..

root@zfs-demo:/supershredder/lamedeath# mount
/dev/vda1 on / type ext4 (rw,errors=remount-ro)
proc on /proc type proc (rw,noexec,nosuid,nodev)
sysfs on /sys type sysfs (rw,noexec,nosuid,nodev)
none on /sys/fs/cgroup type tmpfs (rw)
none on /sys/fs/fuse/connections type fusectl (rw)
none on /sys/kernel/debug type debugfs (rw)
none on /sys/kernel/security type securityfs (rw)
udev on /dev type devtmpfs (rw,mode=0755)
devpts on /dev/pts type devpts (rw,noexec,nosuid,gid=5,mode=0620)
tmpfs on /run type tmpfs (rw,noexec,nosuid,size=10%,mode=0755)
none on /run/lock type tmpfs (rw,noexec,nosuid,nodev,size=5242880)
none on /run/shm type tmpfs (rw,nosuid,nodev)
none on /run/user type tmpfs (rw,noexec,nosuid,nodev,size=104857600,mode=0755)
none on /sys/fs/pstore type pstore (rw)
systemd on /sys/fs/cgroup/systemd type cgroup (rw,noexec,nosuid,nodev,none,name=systemd)
supershredder on /supershredder type zfs (rw,xattr)                     // here is our pool mounted
supershredder/lamedeath on /supershredder/lamedeath type zfs (rw,xattr) // here is our dataset mounted

root@zfs-demo:/supershredder/lamedeath#
Above you can see that we now have mounted a zfs filesystem (simply by creating it) called “lamedeath” which has 3.8GB free. Changing something like compression is as simple as
root@zfs-demo:/# zfs get compression
NAME                     PROPERTY     VALUE     SOURCE
supershredder            compression  off       default
supershredder/lamedeath  compression  off       default

root@zfs-demo:/# zfs set compression=lz4 supershredder/lamedeath
root@zfs-demo:/# zfs get compression
NAME                     PROPERTY     VALUE     SOURCE
supershredder            compression  off       default
supershredder/lamedeath  compression  lz4       local
root@zfs-demo:/#
Now all files written to “lamedeath” will be compressed with lz4, and don’t worry it’s very fast and saves you a TON of space. At this point you have total control of functional local storage. However, it will take some time to get used to the commands so as with any linux command MAN is your friend
man zpool
man zfs
You’ll want to read those over to some degree before you consider seriously using ZFS in production.
Overview and future post plans
This tutorial will give you the skills you need to build and use ZFS and most of it will work on every implementation including OpenSolaris implementation like OmniOS, SmartOS & OpenIndiana. A setup like the one above will be about as good as any HW RAID setup with a bit more flexibility but there are still a few major topics I need to cover in the future such as
- Snapshots, clones and zfs send/receive
- Data integrity (failed drives, maintenance, planning and what to do when things go wrong)
- Tuning (basic and advanced) understanding the infrastructure, finding your own bottlenecks and fixing them
In the meantime here are some links you may find useful
| https://sites.google.com/site/eonstorage/zpool_notes | Info on read/write penalty of pool types |
| https://blogs.oracle.com/brendan/entry/test | When and how to use SSDs (and why they make sense in ZFS) |
| http://www.solarisinternals.com/wiki/index.php/ZFS_Evil_Tuning_Guide | A tuning guide (from Solaris perspective, but this mostly applies to ZoL) |
| https://calomel.org/zfs_raid_speed_capacity.html | Speed comparisons between different zpool setups |
Since you say that RAIDZ3 needs 5 disks, you’re missing a device in this command:
zpool create raidz3 disk0 disk1 disk3 disk4
It should be:
zpool create raidz3 disk0 disk1 disk3 disk4 disk5
You’re correct, it was an oversight both for the actual minimum and for the zpool create commands. I have fixed that and verified my numbers.
Below is a paste to show the real minimums
Step 5- RaidZ1, Z2 and Z3 CLI examples: is a pool name not required?
You always need to specify a pool name with zpool create. That was a syntax mistake in my table, I have corrected it. Thanks for noticing.
I’ve just got a NAS running ZFS and I’d like to preserve creation times when transferring files to it. Both linux/ext4 (where the data is now) and zfs store creation time or birth time. in the case of zfs it’s even reported by the stat command. But I haven’t been able to figure out how I can set the creation time of a file so it mirrors the creating time in the original file system.
Is there a tool similar to debugfs for ZFS?
[…] 5) I don’t like the wwn-* names because they are non-descriptive to me. I’d much rather have names that reflect the serial number of the disk, so I can easily identify them if I need to do a replacement. I’ve gone ahead and setup aliases in /dev/disk/by-vdev/ (aliasing to wwn-*), following the advice in http://kbdone.com/zfs-basics/#Consistent_device_IDs_via_vdev_idconf_file: […]
Just ran across this tutorial. What a gem. Thank you for the clarity.
Perfect entry guide. I loved it. :-)